Your cart is currently empty!

Model FACTORY
3D models for 3D printing

Forum
♥ Our NEWEST CHASSIS is OUT! ♥
Forum breadcrumbs – You are here:Welcome to the Model FACTORY / mfactory33 – COMMUNITY!DESTINY the 1/10 scale 3D-printed custom on-road RC car CHASSIS (2WD, rear): DESTINY – Social DevelopmentImprovements, ideas, new developm …
You need to log in to create posts and topics.
Improvements, ideas, new developments of DESTINY
#16 · September 26, 2024, 3:38 pm
Quote from Szilard on September 26, 2024, 3:38 pmThanks for your feedback!!
We noticed some weight is missing and needed especially the 3D printed parts version – The difference is obvious when you install all the metal made factory parts it gets heavier and the situation improves a bit. In the future we will have to do something about this issue!
Thanks for your feedback!!
We noticed some weight is missing and needed especially the 3D printed parts version – The difference is obvious when you install all the metal made factory parts it gets heavier and the situation improves a bit. In the future we will have to do something about this issue!
Click for thumbs down.0Click for thumbs up.0
#17 · October 10, 2024, 10:20 pm
Quote from antibala on October 10, 2024, 10:20 pmHello new improvement are here.
We’ll be adding these updates to the download folder soon.
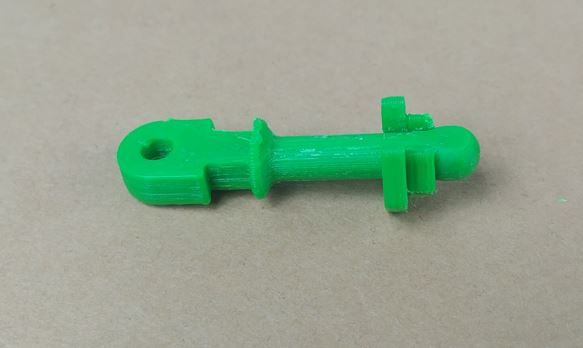
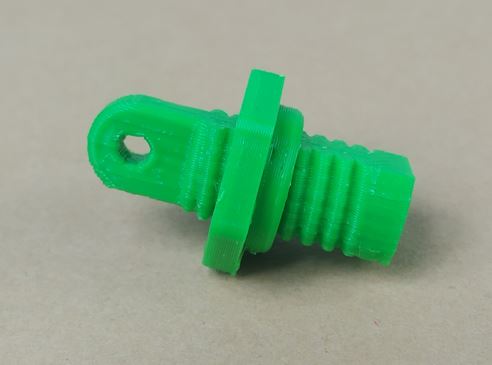
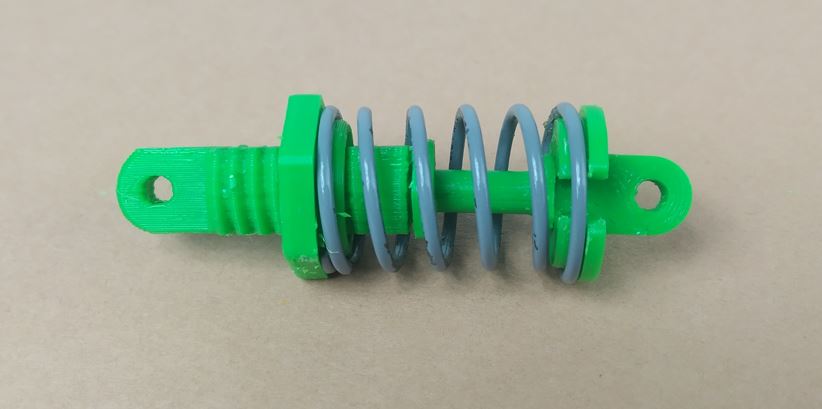
First up is a fully 3D-printed shock absorber designed to be assembled with a purchased spring.
The inner diameter of the spring is 12-14 mm
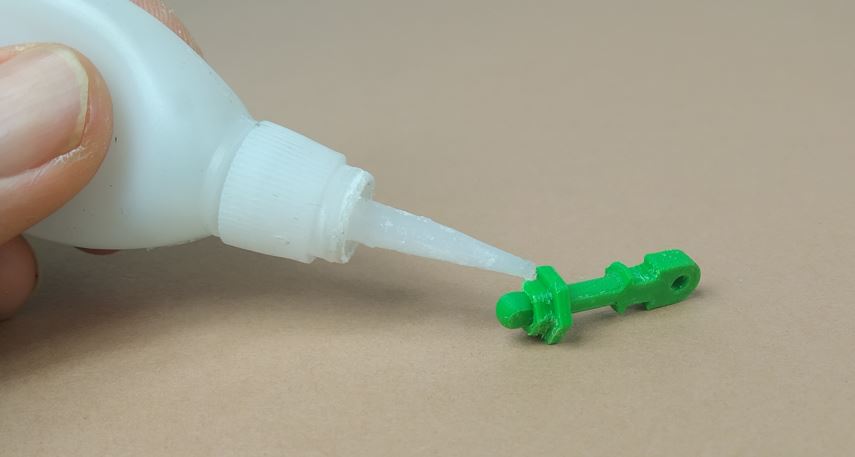
A little nut need to be glued to the base part after it was snapped to the shaft.
Hello new improvement are here.
We’ll be adding these updates to the download folder soon.
First up is a fully 3D-printed shock absorber designed to be assembled with a purchased spring.
The inner diameter of the spring is 12-14 mm
A little nut need to be glued to the base part after it was snapped to the shaft.
Uploaded files: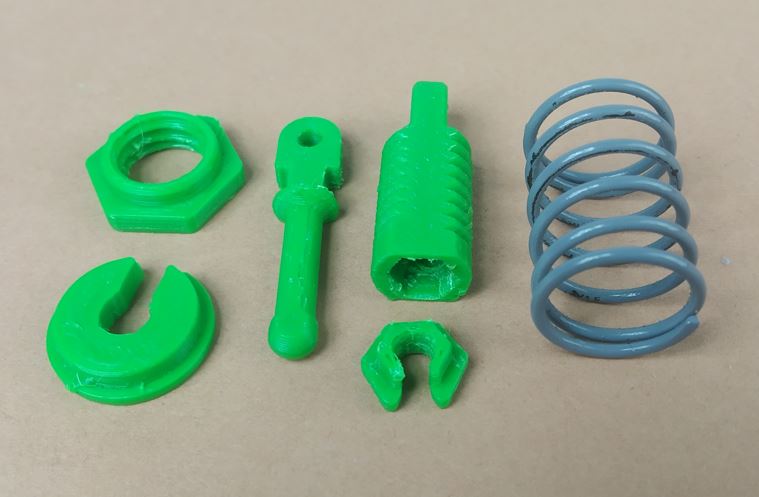
Click for thumbs down.0Click for thumbs up.1
Deleted user has reacted to this post.
Deleted user
#18 · October 10, 2024, 10:28 pm
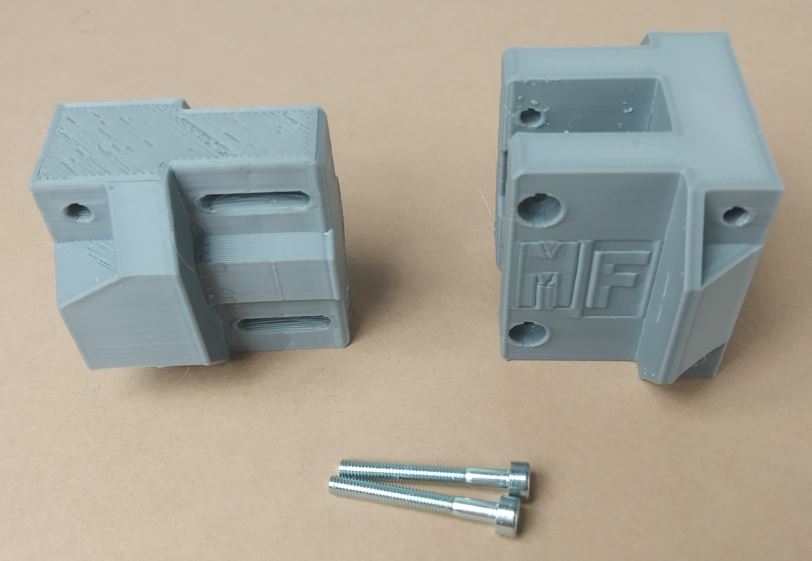
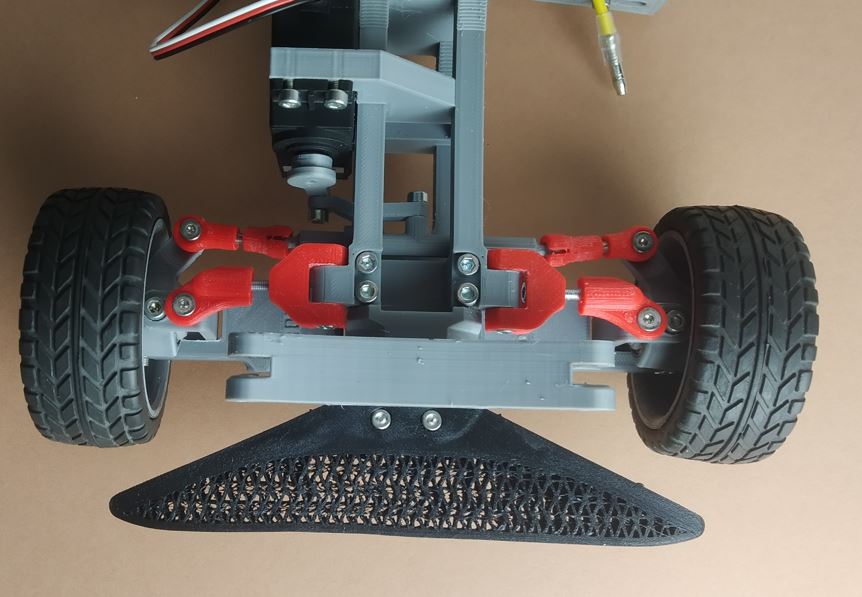
Quote from antibala on October 10, 2024, 10:28 pmAdjustable connecting part linking the front and rear of the chassis,
with a wheelbase range of 261-273 mm, and a larger option of 273-285 mm.
I believe this enhances the chassis’s versatility and allows the connecting element to be used with other cars.
Adjustable connecting part linking the front and rear of the chassis,
with a wheelbase range of 261-273 mm, and a larger option of 273-285 mm.
I believe this enhances the chassis’s versatility and allows the connecting element to be used with other cars.
Uploaded files:
Click for thumbs down.0Click for thumbs up.1
Deleted user has reacted to this post.
Deleted user
#19 · October 10, 2024, 10:39 pm
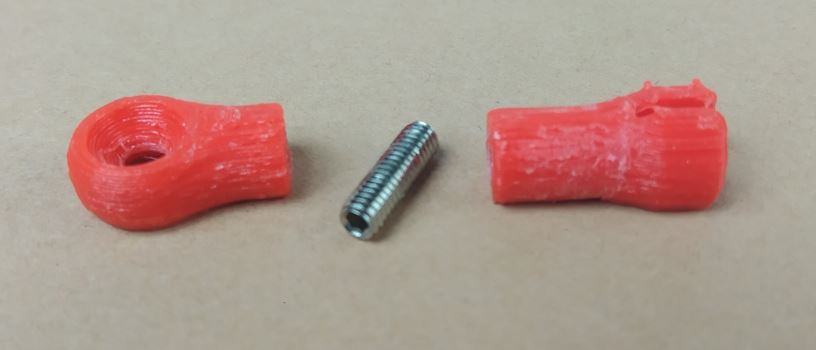
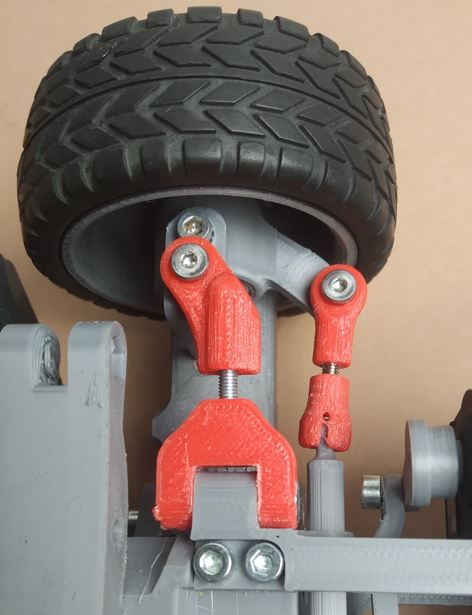
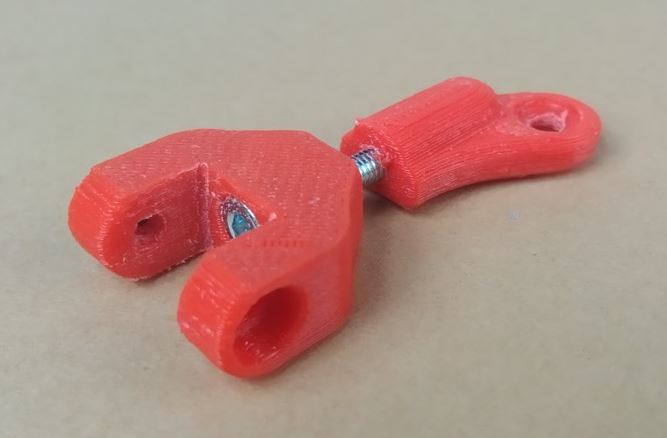
Quote from antibala on October 10, 2024, 10:39 pmAdjustable steering joint for setting the wheels to either toe-in or toe-out alignment.
The two parts are connected using a DIN913 hex socket set screw with a flat point, size M3x8-16 mm
Adjustable steering joint for setting the wheels to either toe-in or toe-out alignment.
The two parts are connected using a DIN913 hex socket set screw with a flat point, size M3x8-16 mm
Uploaded files: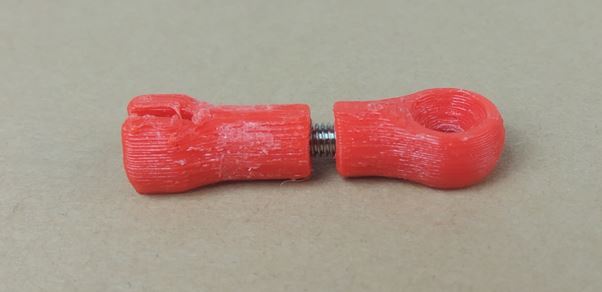
Click for thumbs down.0Click for thumbs up.1
Last edited on October 10, 2024, 10:41 pm by antibala
Deleted user has reacted to this post.
Deleted user
#20 · October 10, 2024, 10:43 pm
Quote from antibala on October 10, 2024, 10:43 pmYou also made some improvements to the bumper! 🙂
I designed mine a bit differently
You also made some improvements to the bumper! 🙂
I designed mine a bit differently
Uploaded files: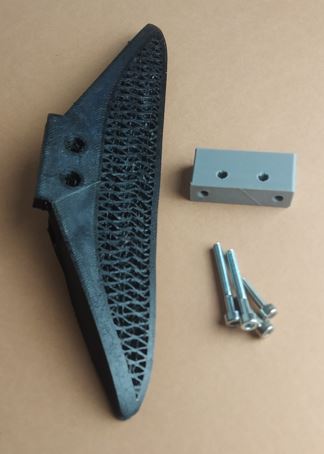
Click for thumbs down.0Click for thumbs up.1
Deleted user has reacted to this post.
Deleted user
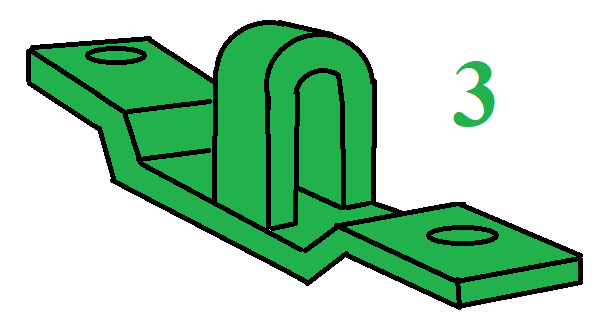
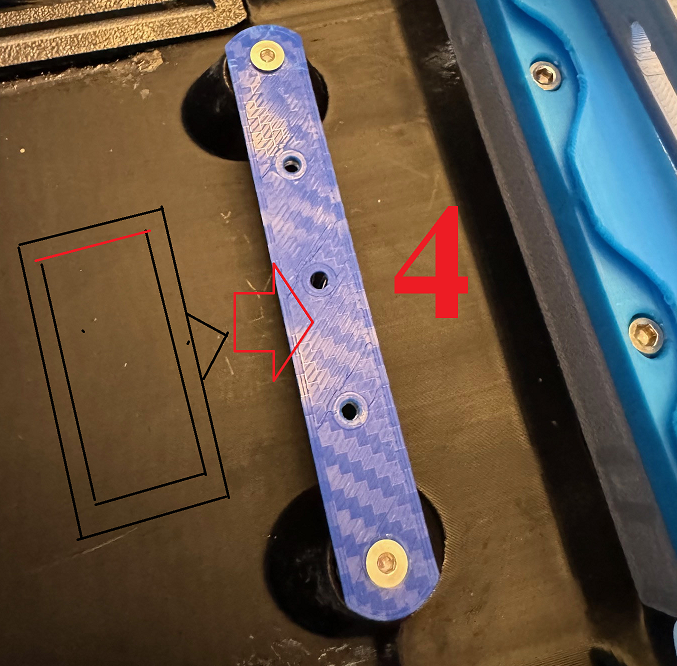
#21 · October 10, 2024, 10:46 pm
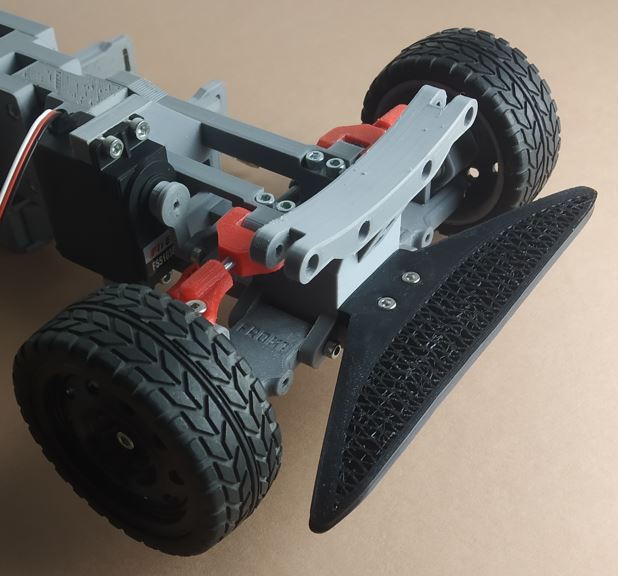
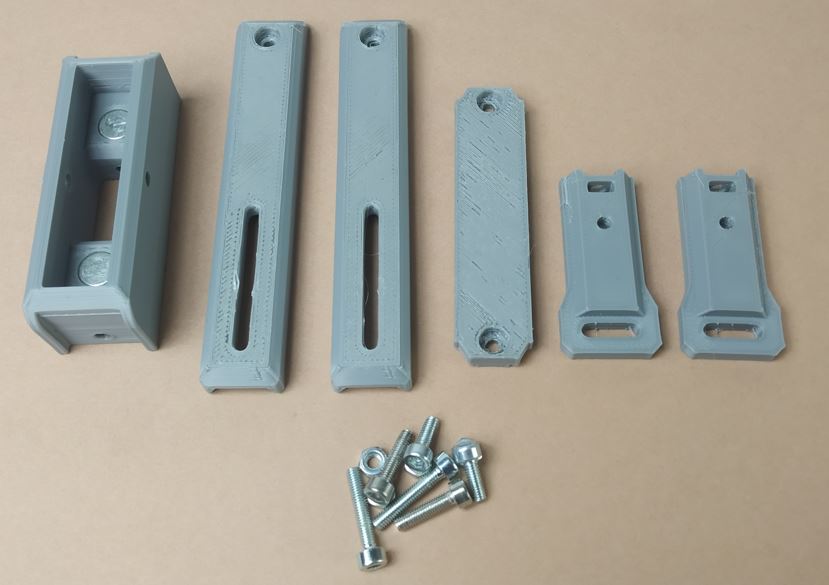
Quote from antibala on October 10, 2024, 10:46 pmI’ve already designed many versions of this bracket.
This one will require a bit more assembly but will be stronger.
I’ve already designed many versions of this bracket.
This one will require a bit more assembly but will be stronger.
Uploaded files: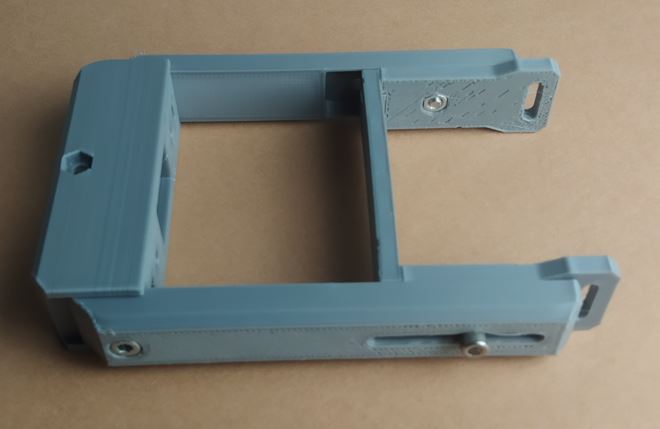
Click for thumbs down.0Click for thumbs up.1
Szilard has reacted to this post.
Szilard
#22 · October 10, 2024, 10:53 pm
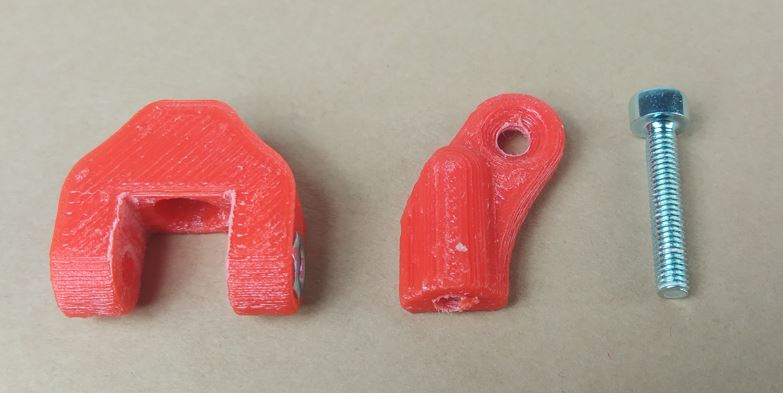
Quote from antibala on October 10, 2024, 10:53 pmWith this modification, the upper arm will be much easier to produce—no more cutting of threaded rods!
It was a mistake not to use this from the beginning.
Only a DIN912 M3 bolt is needed to connect the two parts.
With this modification, the upper arm will be much easier to produce—no more cutting of threaded rods!
It was a mistake not to use this from the beginning.
Only a DIN912 M3 bolt is needed to connect the two parts.
Uploaded files:
Click for thumbs down.0Click for thumbs up.1
Last edited on October 10, 2024, 10:54 pm by antibala
Szilard has reacted to this post.
Szilard
kevman1@kevman1
21 Posts
#23 · October 12, 2024, 6:23 pm
Quote from kevman1 on October 12, 2024, 6:23 pmI’m looking for a way to mount the bodies designed for this chassis ( https://www.thingiverse.com/thing:4892947 ) to the Destiny, any ideas ? I have several bodies from Cults (https://cults3d.com/en/users/CarPrint/3d-models) which are amazing, but the Dukedoks chassis is not durable and would love to try this one out. I made a custom brace for those bodies here (https://ibb.co/D8gfdDJ)
Would love to hear some ideas, I can try to design something , but don’t know where to begin.
I’m looking for a way to mount the bodies designed for this chassis ( https://www.thingiverse.com/thing:4892947 ) to the Destiny, any ideas ? I have several bodies from Cults (https://cults3d.com/en/users/CarPrint/3d-models) which are amazing, but the Dukedoks chassis is not durable and would love to try this one out. I made a custom brace for those bodies here (https://ibb.co/D8gfdDJ)
Would love to hear some ideas, I can try to design something , but don’t know where to begin.
Click for thumbs down.0Click for thumbs up.1
antibala has reacted to this post.
antibala
#24 · October 14, 2024, 7:48 am
Quote from antibala on October 14, 2024, 7:48 amHello Kevman,
Very interesting what you do 🙂
I have some ideas for the front mounting of the body:
1.) You could design the same clamp as ours, ,if it fits in height
2.) You can try to mount our bracket to yours. Need to align the holes on your bracket.
3.) If the height not enough, you could try to design something like this.
4.) If our companion piece bracket (which goes to the body) fits into the two cone, you can use our system.
Our rear mounting is at the roof of the car. I think it can be applied without any difficulty. As far as I know, he’s not fixing the body at the roof.
In this video you can learn our fixing method (with 2-2 brackets and magnets):
https://www.youtube.com/watch?v=gocSfy8zPko&t=696s
at 35:34 the front brackets
at 38:11 the rear brackets
If you find a solution please share with us 🙂
Best regards,
Balázs
Hello Kevman,
Very interesting what you do 🙂
I have some ideas for the front mounting of the body:
1.) You could design the same clamp as ours, ,if it fits in height
2.) You can try to mount our bracket to yours. Need to align the holes on your bracket.
3.) If the height not enough, you could try to design something like this.
4.) If our companion piece bracket (which goes to the body) fits into the two cone, you can use our system.
Our rear mounting is at the roof of the car. I think it can be applied without any difficulty. As far as I know, he’s not fixing the body at the roof.
In this video you can learn our fixing method (with 2-2 brackets and magnets):
at 35:34 the front brackets
at 38:11 the rear brackets
If you find a solution please share with us 🙂
Best regards,
Balázs
Uploaded files: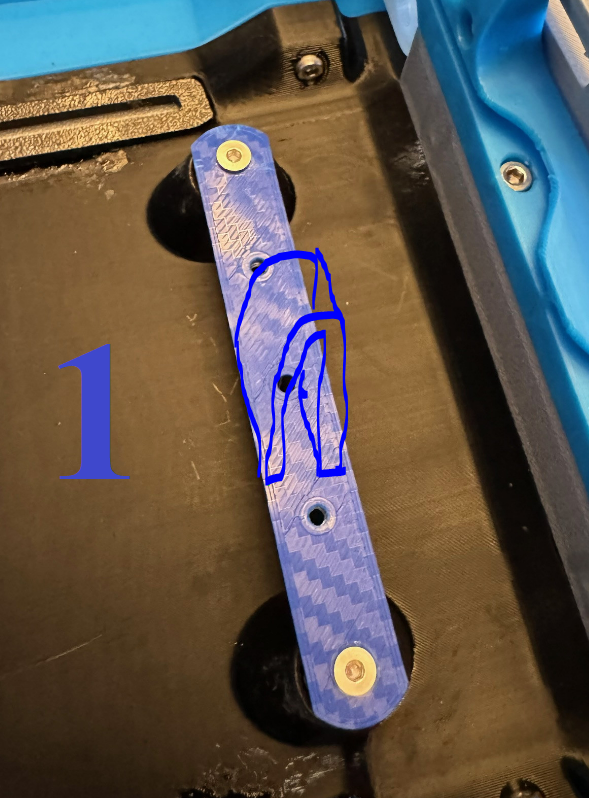

Click for thumbs down.0Click for thumbs up.0
kevman1@kevman1
21 Posts
#25 · October 18, 2024, 4:06 am
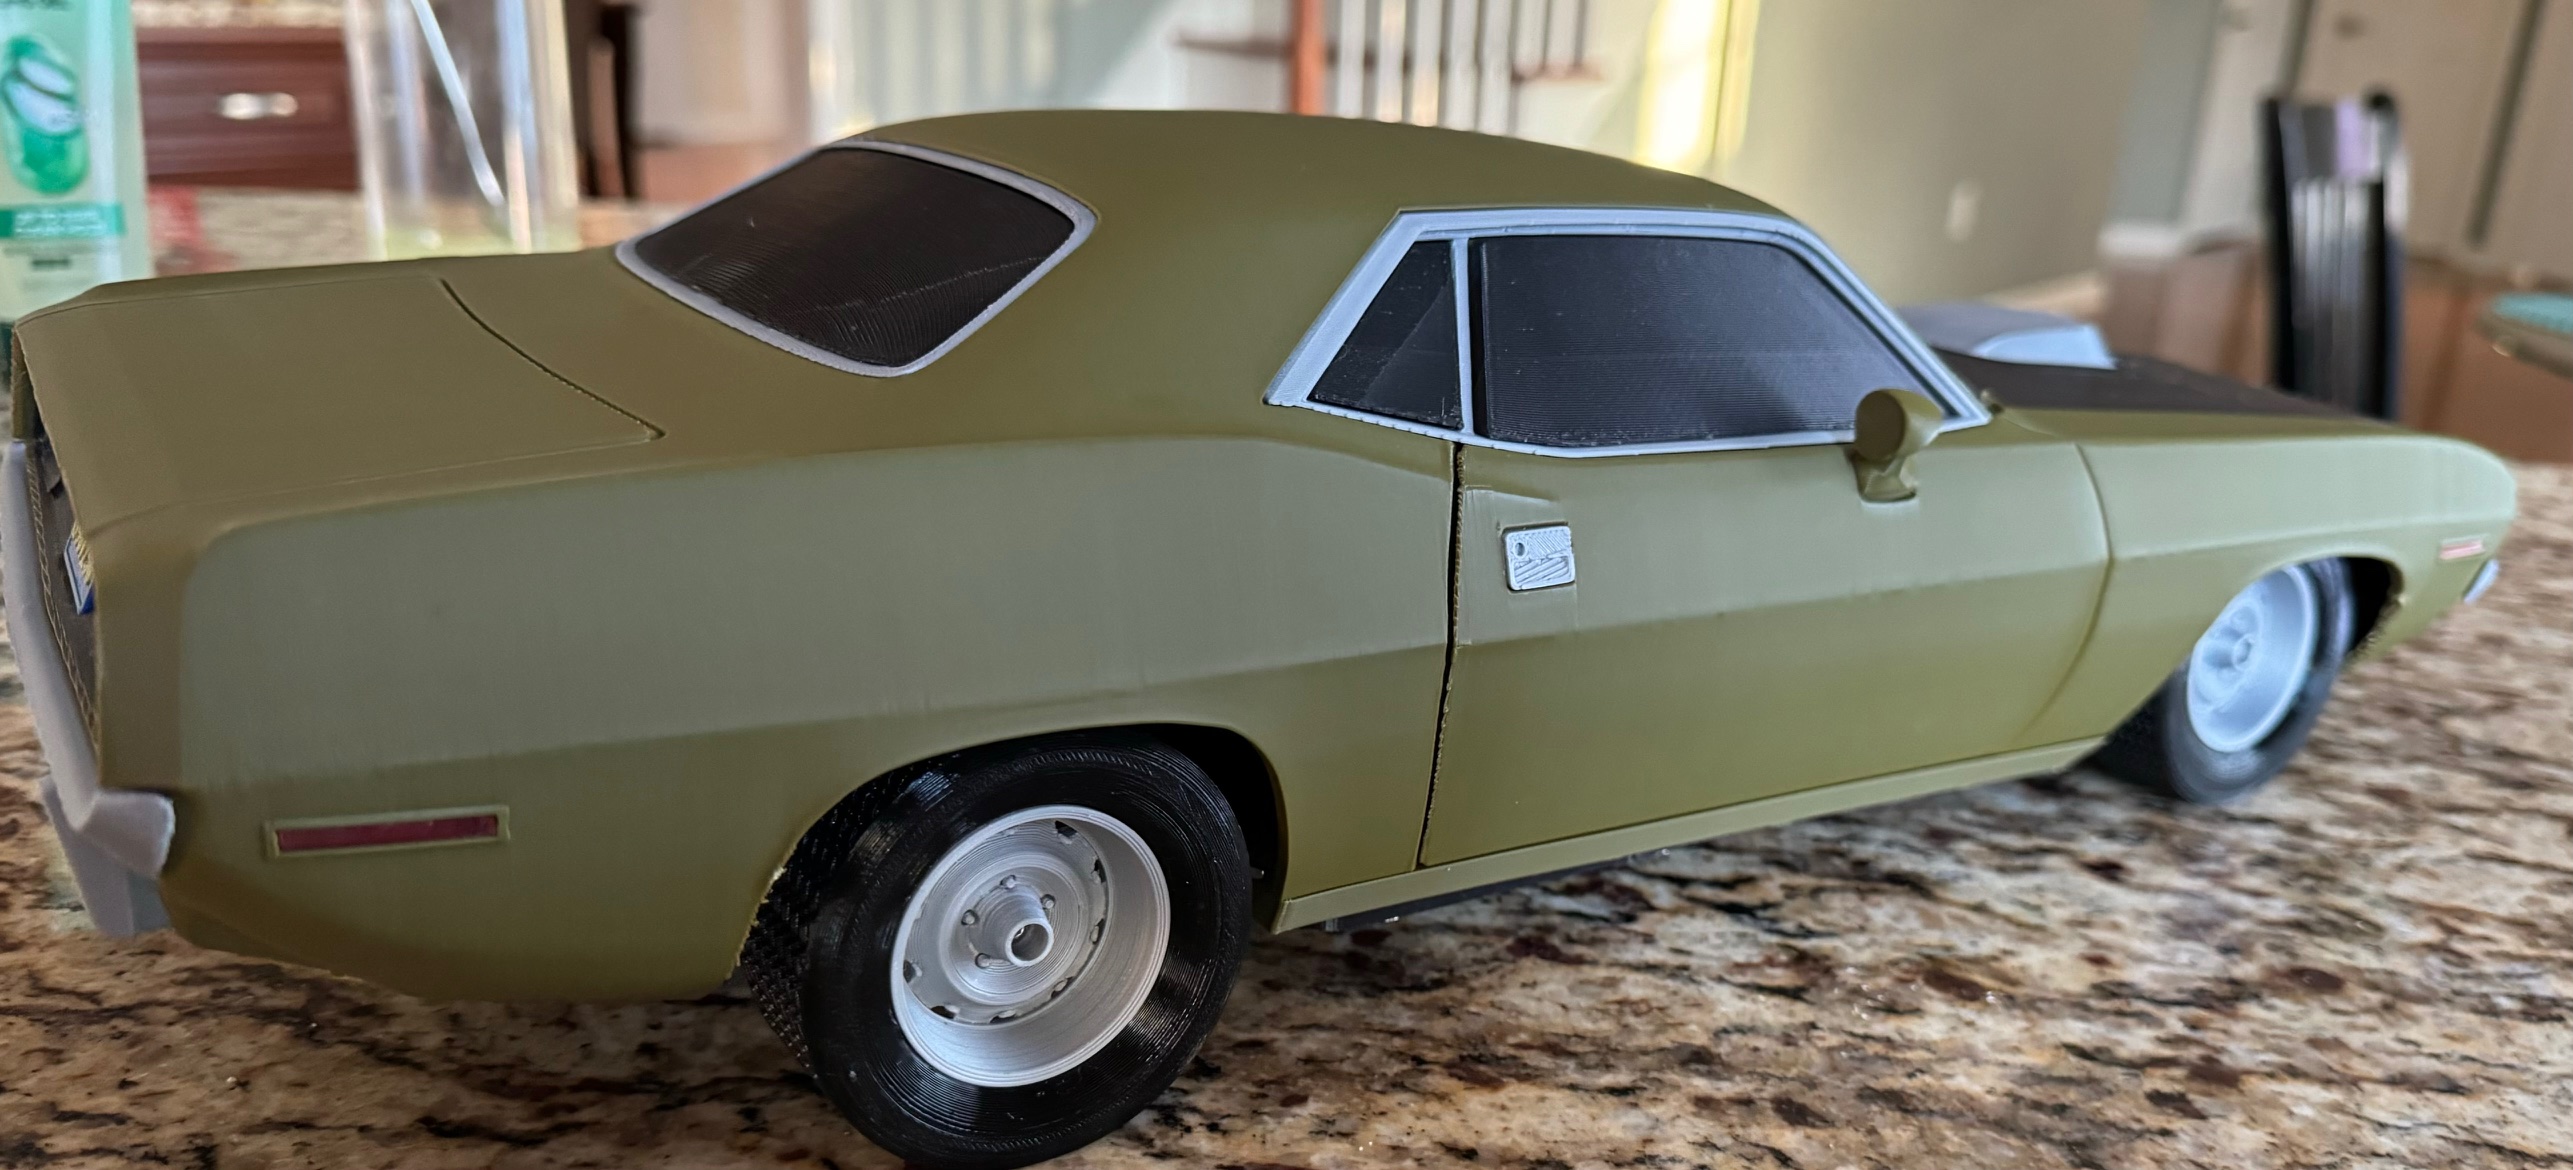
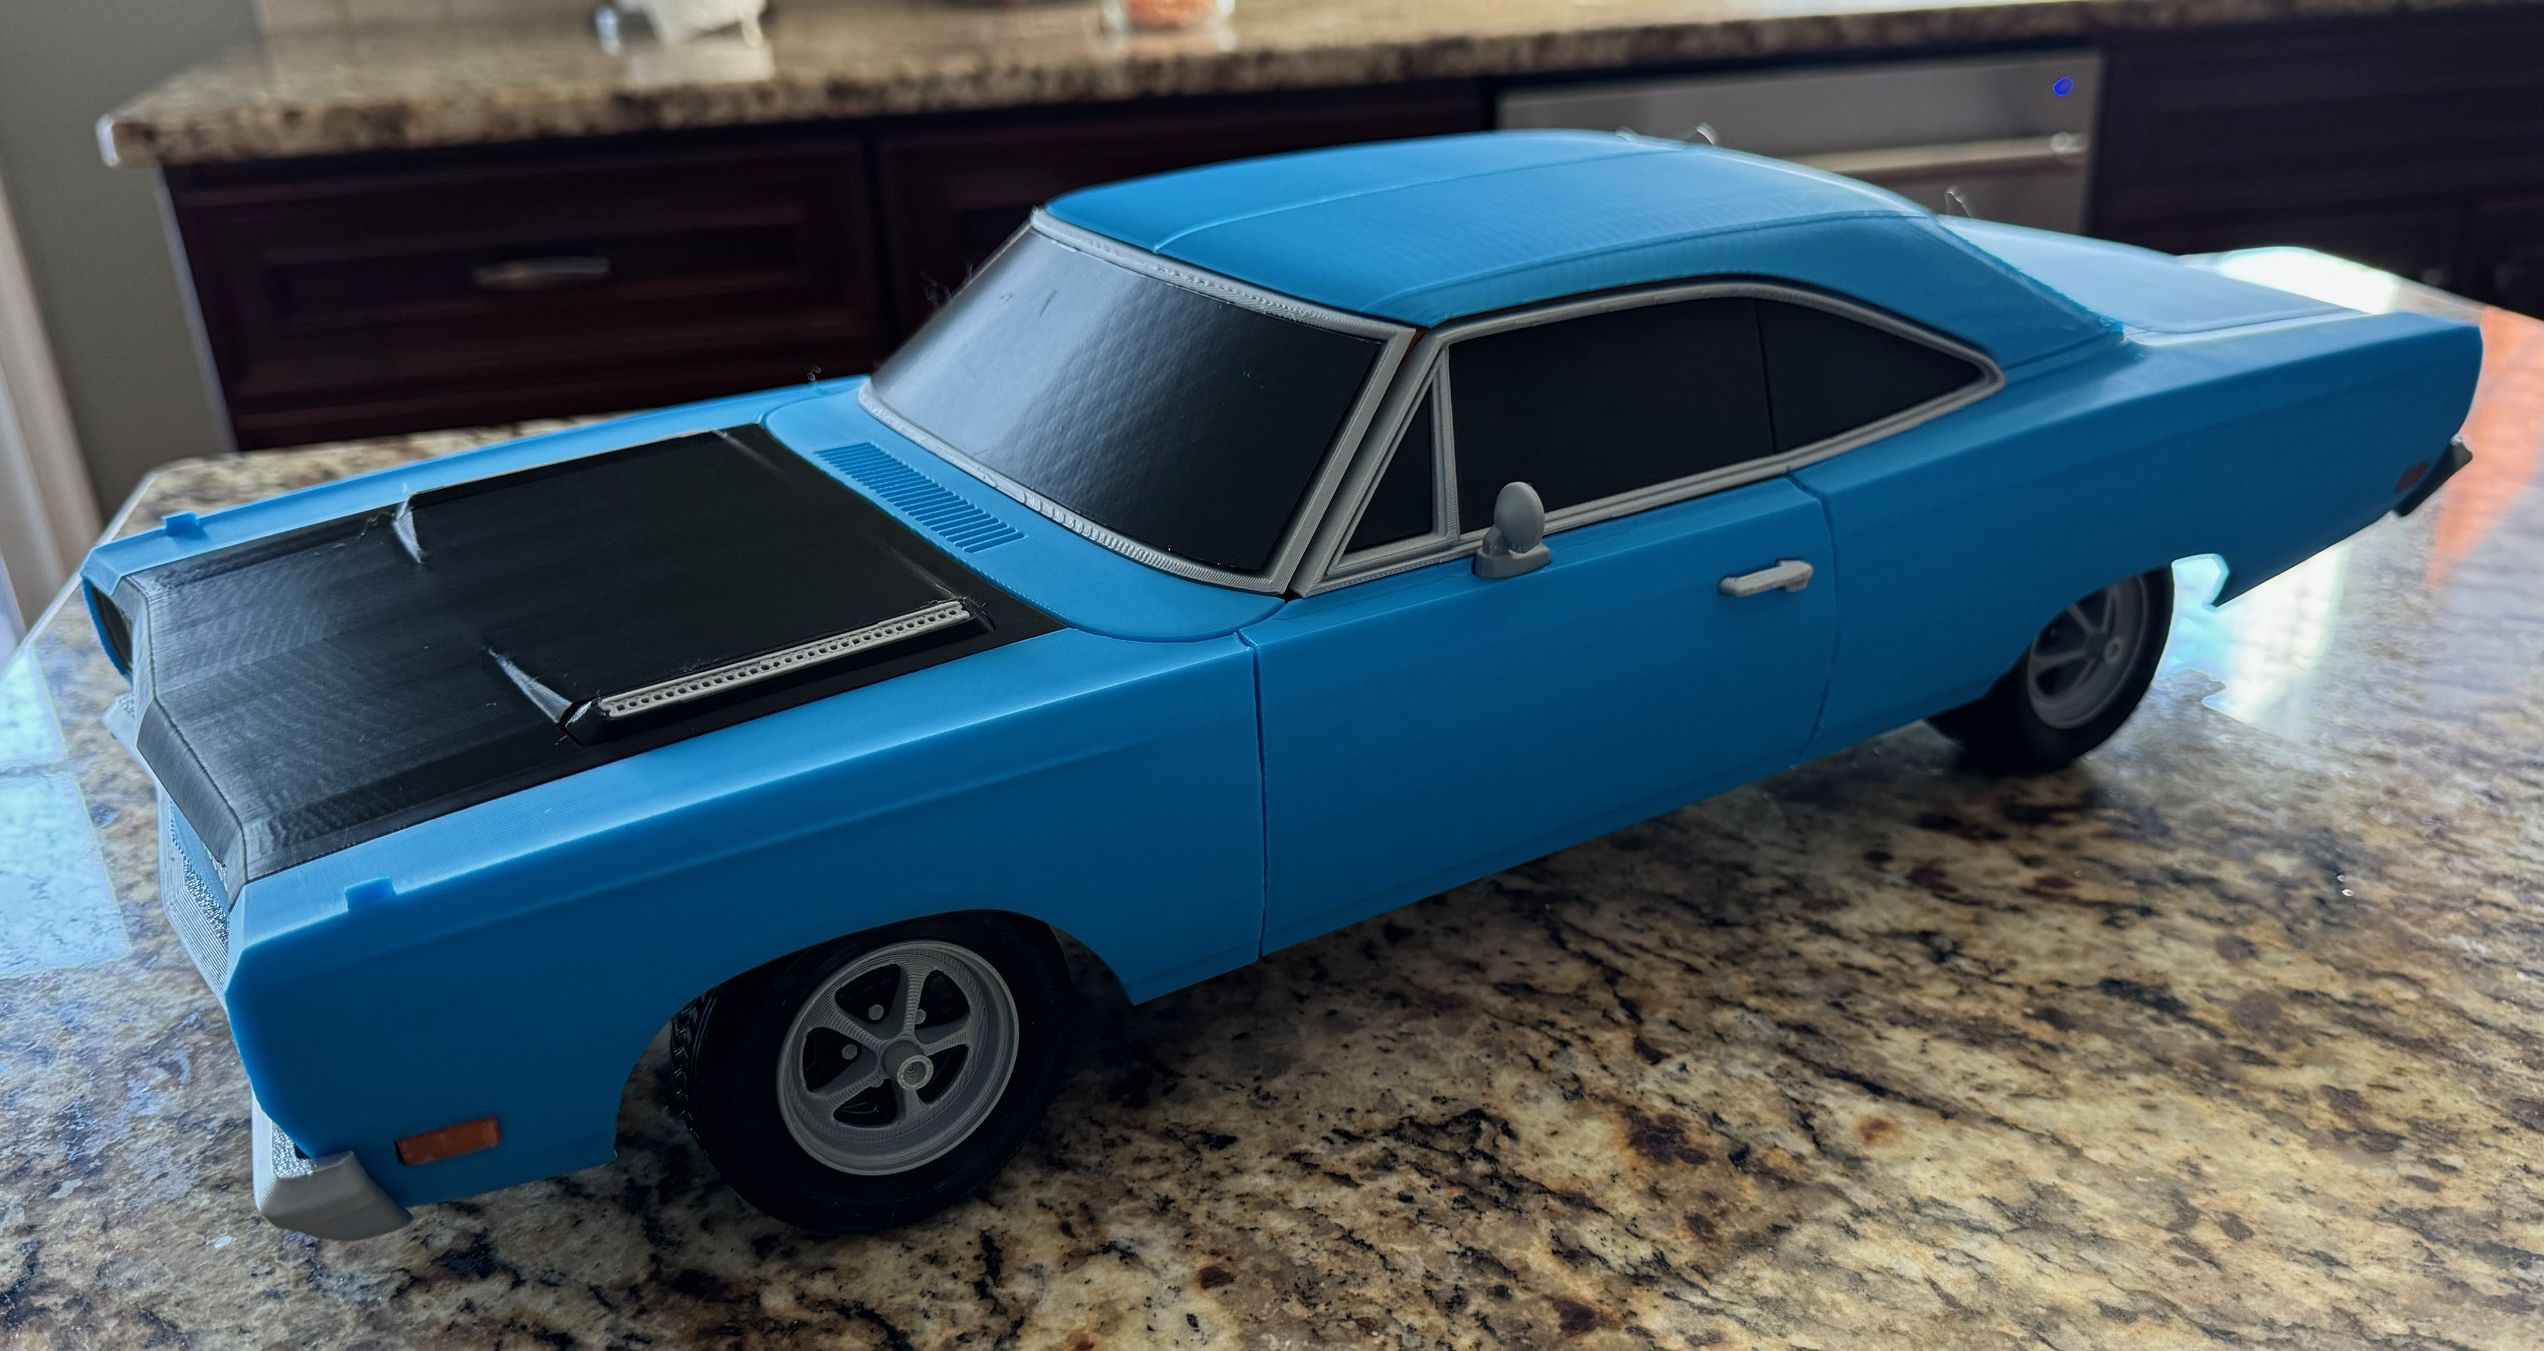
Quote from kevman1 on October 18, 2024, 4:06 amThank you for the ideas and response. I spoke to the designer on Cults and he mentioned that he tried to get your permission to use your chassis’s to design his bodies, but he was not able to , would you consider it ? It would be amazing, he is CarPrint on Cults. here are some of his amazing bodies that I have printed.
Thank you for the ideas and response. I spoke to the designer on Cults and he mentioned that he tried to get your permission to use your chassis’s to design his bodies, but he was not able to , would you consider it ? It would be amazing, he is CarPrint on Cults. here are some of his amazing bodies that I have printed.
Uploaded files:
Click for thumbs down.0Click for thumbs up.1
Deleted user has reacted to this post.
Deleted user
#26 · October 21, 2024, 1:17 pm
Quote from antibala on October 21, 2024, 1:17 pmHello Kevman1,
Destiny is available for free use. If you or anybody choose to use it, we kindly ask that you mention us or share our website as its source.
thanks,
best regards
Balázs
Hello Kevman1,
Destiny is available for free use. If you or anybody choose to use it, we kindly ask that you mention us or share our website as its source.
thanks,
best regards
Balázs
Click for thumbs down.0Click for thumbs up.0
kevman1@kevman1
21 Posts
#27 · October 24, 2024, 2:25 am
Quote from kevman1 on October 24, 2024, 2:25 amIs there a way to use Tamiya style Turnbuckles for the front and rear? I have an abundance of those laying around. If not where are you sourcing the threaded rod for the turnbuckle in those sizes ?
Is there a way to use Tamiya style Turnbuckles for the front and rear? I have an abundance of those laying around. If not where are you sourcing the threaded rod for the turnbuckle in those sizes ?
Click for thumbs down.0Click for thumbs up.0
kevman1@kevman1
21 Posts
#28 · October 24, 2024, 4:06 am
Quote from kevman1 on October 24, 2024, 4:06 amQuote from antibala on October 10, 2024, 10:53 pmWith this modification, the upper arm will be much easier to produce—no more cutting of threaded rods!
It was a mistake not to use this from the beginning.
Only a DIN912 M3 bolt is needed to connect the two parts.
Where are the STL for these files?
Quote from antibala on October 10, 2024, 10:53 pmWith this modification, the upper arm will be much easier to produce—no more cutting of threaded rods!
It was a mistake not to use this from the beginning.
Only a DIN912 M3 bolt is needed to connect the two parts.
Where are the STL for these files?
Click for thumbs down.0Click for thumbs up.0
#29 · October 25, 2024, 12:14 pm
Quote from antibala on October 25, 2024, 12:14 pmHello Kevman,
I will upload the new FILES this weekend. The threaded rods are cutted from 1 meter rod, which you can buy in a hardware store.
The new one with bolt will be much easier and better solution.
You can try the Tamiya turnbuckles i not tried them yet.
Hello Kevman,
I will upload the new FILES this weekend. The threaded rods are cutted from 1 meter rod, which you can buy in a hardware store.
The new one with bolt will be much easier and better solution.
You can try the Tamiya turnbuckles i not tried them yet.
Click for thumbs down.0Click for thumbs up.0
kevman1@kevman1
21 Posts
#30 · October 26, 2024, 5:26 pm
Quote from kevman1 on October 26, 2024, 5:26 pmmy frankenstein, I have adapted your drive unit and rear to the dukedok’s chassis! Still need the turnbuckles and dogbones but this is looking great.
https://ibb.co/gSpdPzM
my frankenstein, I have adapted your drive unit and rear to the dukedok’s chassis! Still need the turnbuckles and dogbones but this is looking great.

Click for thumbs down.0Click for thumbs up.2
Szilard and Deleted user have reacted to this post.
SzilardDeleted user
OUR NEWEST CHASSIS is OUT!

Did you know??? You can set your profile image in My Account/Profile&Membeship/Edit Profile!
Get discounts!
-25% -50% -75%
On everything!
With Your Support you guys help us to be able to focus only on this
(no more 9-5 jobs)
We want to give you more 🙂
Let’s Grow Together!