
Your cart is currently empty!
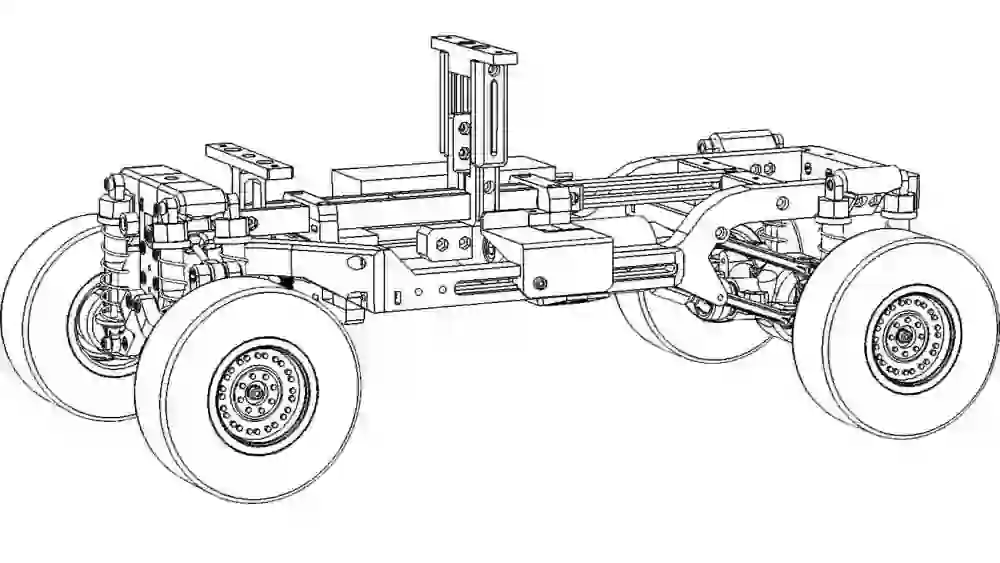
3D printable 1/10 RC Troopy Truck Chassis STL files
Assembly Guide for 3D printing and ASSEMBLY
This Chassis right now is only rear 2WD – We are working on the 4WD feature! Rear & Front Track is only 220mm – Wider Spectrum for tracks is under development!!!
Chassis Dimensions:
Wheelbase: 260-370mm
Rear&Front Track: 220mm
INFINITY
Bill of Materials
DIN912 bolts
M3 nuts 95 pcs
M3x6 13 pcs
M3x8 16 pcs
M3x10 12 pcs
M3x12 24 pcs
M3x16 23 pcs
M3x20 21 pcs
M3x25 7 pcs
M3x30 7 pcs
M3x35 4 pcs
DIN7991 Countersunk screw with hexagon socket
M3x10 10 pcs
DIN913-Hexagon socket set screws with flat point
M3x16 4 pcs
M3x20 2 pcs
DIN125 Washer
Whaser for M3 bolts (D6,4mm) 4 pcs
Magnets
D8x4 mm 8 pcs
Bearings
10x15x4 14 pcs
Shock absorbers
Hole to Hole 80mm 4 or 8 pcs
Tire from ebay
48x30x98mm / 1.9×1.2×3.9 inch (Inner diameter X Width X Outer diameter)
3D printed tires will be available in the future
Hook-and-loop fastener to fix the battery to the chassis
width 20 mm
Electrics
ESC – Motor Controller
Pistol Grip Transmitter with Receiver
Battery (We use LI-PO 102x35x20mm (LxWxH) 2200mAh)
Servo (Feetech FS5103B)
Optional parts will be in the Future
HSP 94103 Differential
Printed Parts Assembly
1st step in the Assembly of INFINITY
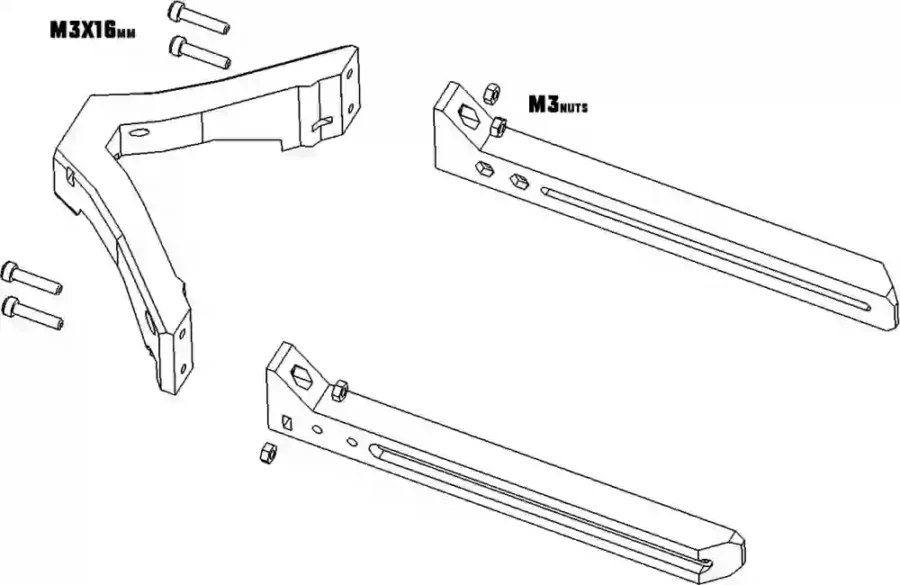
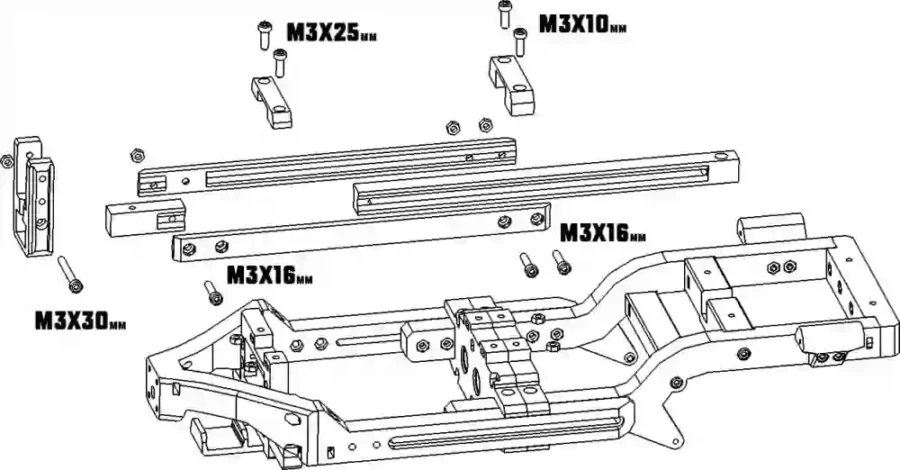
The first assembly move will be the frontal frame of the Chassis. Two pieces need to be put together.
2nd step in the Assembly of INFINITY
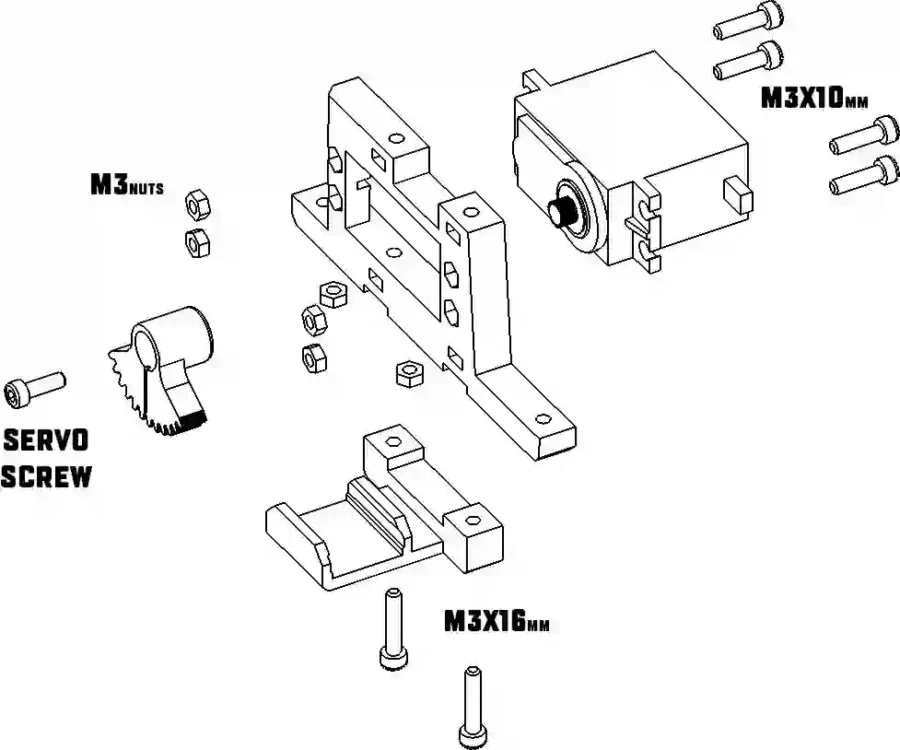
Installing the servo into its bracket and setting up the steering system
3rd step in the Assembly of INFINITY
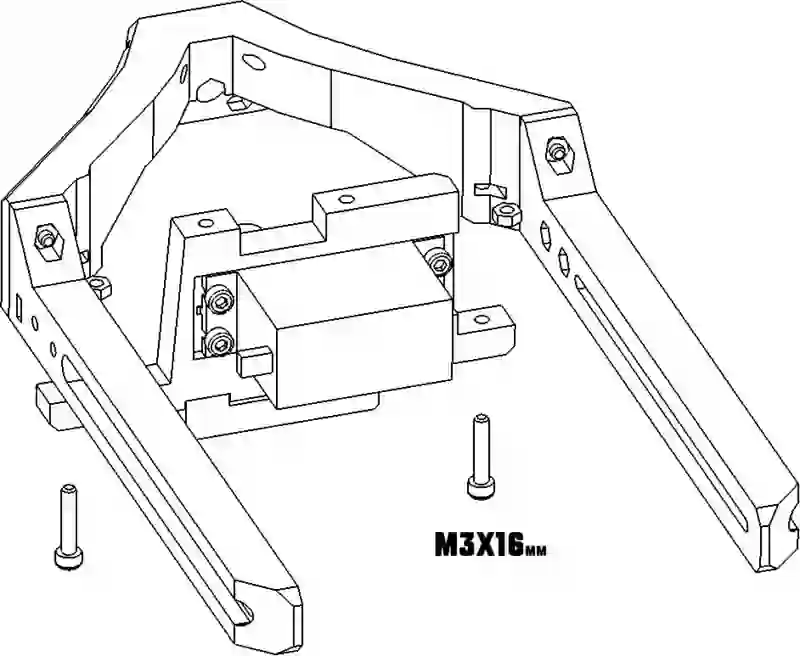
Fixing the Bracketed Servo into the frontal Frame
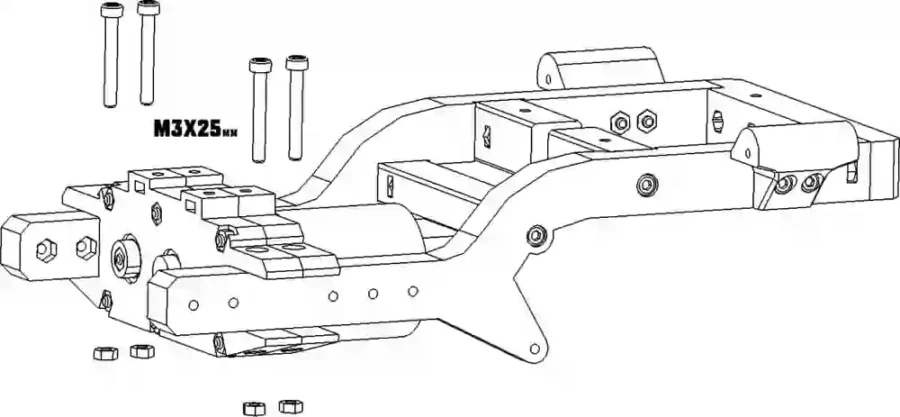
4th step in the Assembly of INFINITY
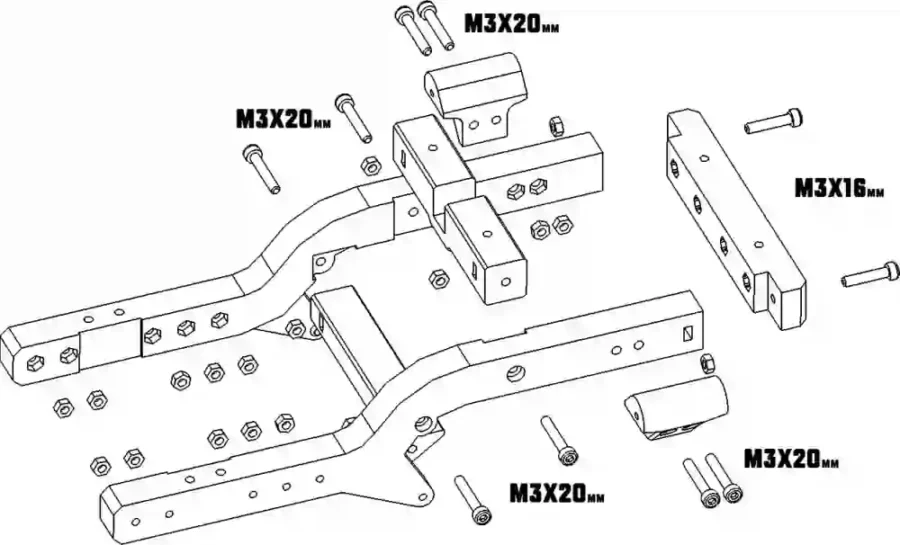
Bolting the Rear Frame. Be aware that all the M3 nuts are hidden, some of them are vertically! This piece will be slided into the Front Frame.
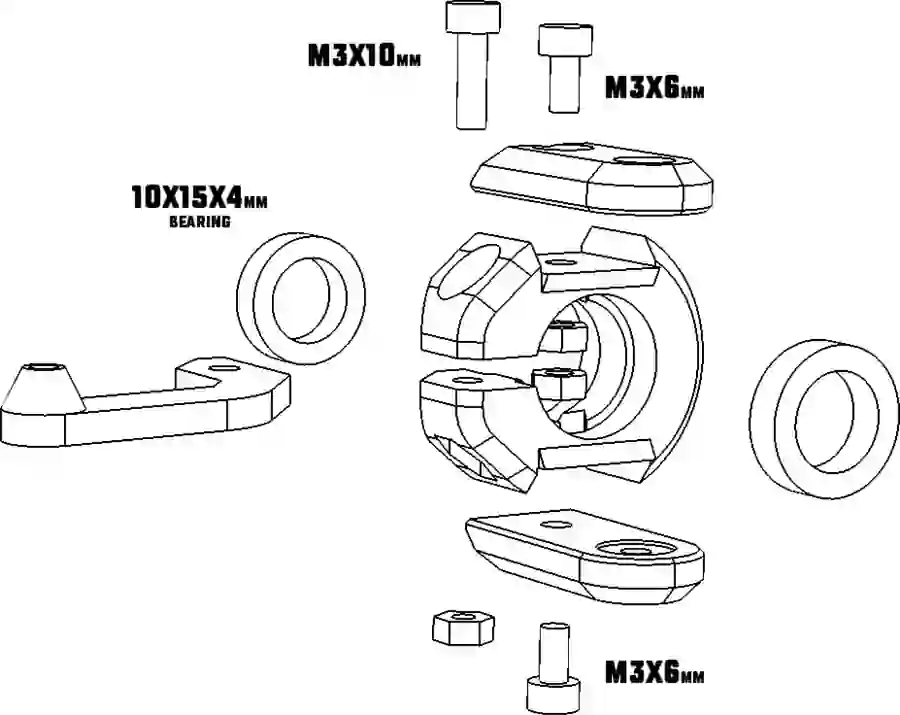
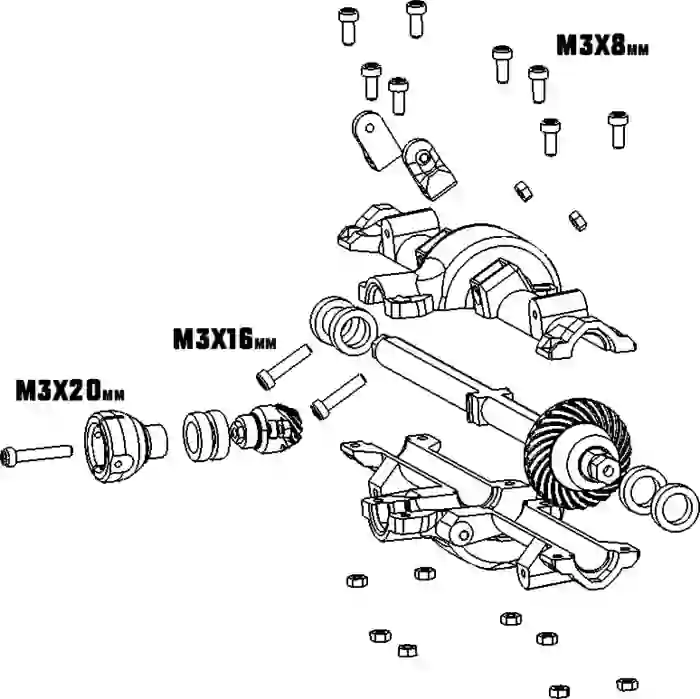
5th step in the Assembly of INFINITY
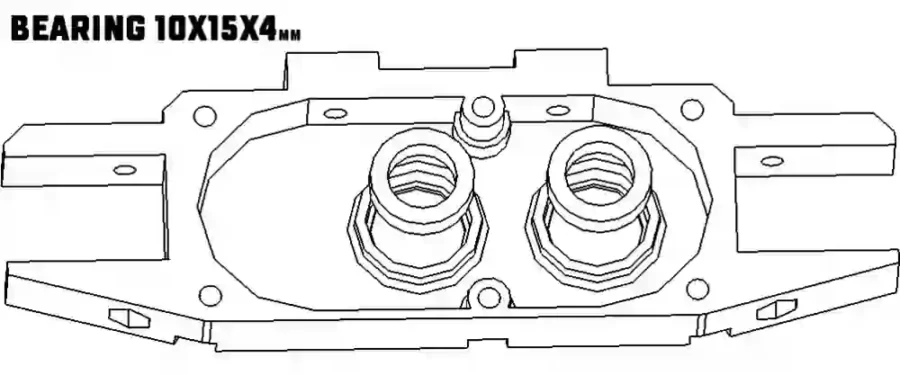
Putting the Bearings into the Gearbox Housing
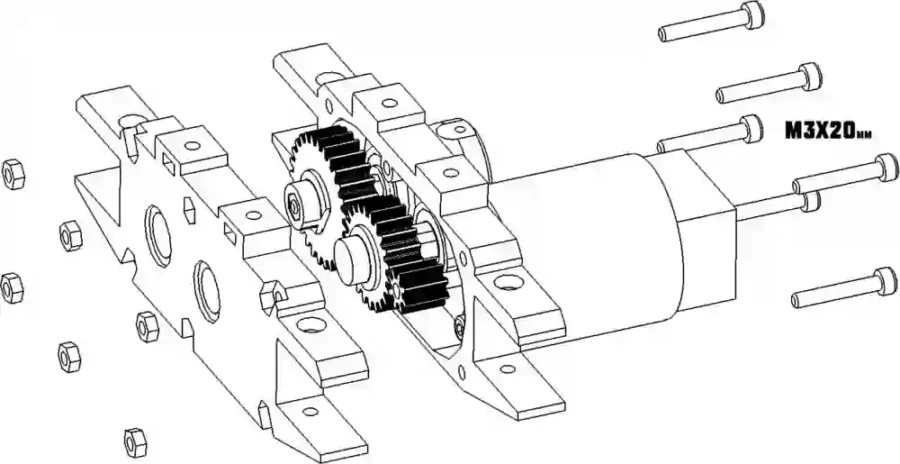
6th step in the Assembly of INFINITY

The other side of the Gearbox with the Gears. Installing the axles inside the gears, bearings in the middle then through first hole to the right (on the picture) goes in the Motor, on the other the Cardan Ball Joint.
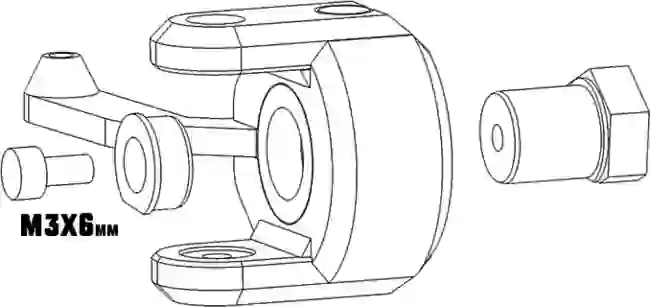
7th step in the Assembly of INFINITY
Bolting The Gearbox Housing together
8th step in the Assembly of INFINITY
Fixing the Gearbox to the Rear Section with 4 Screws. M3 nuts sink into the gearbox lower fixing sections!
9th step in the Assembly of INFINITY
Middle Frame Strenghtening Beam assembly with the base of the Middle Bracket.
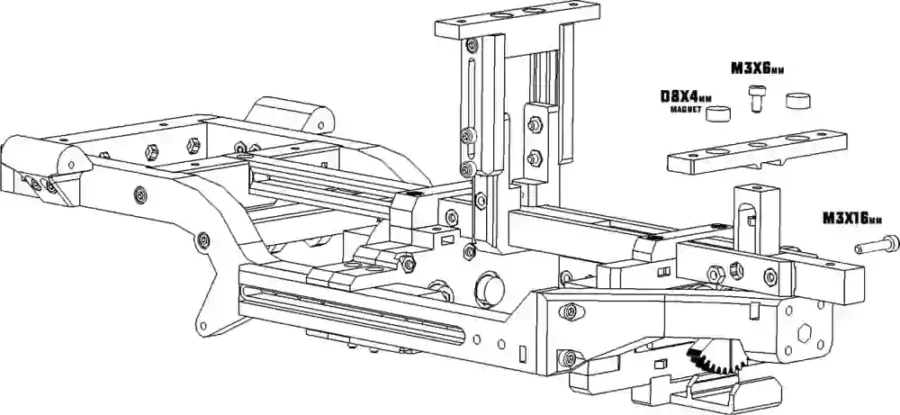
10th step in the Assembly of INFINITY
Screwing all the bolts and placing the two D8x4mm Magnets of the Middle Mounting System (aka. Middle Bracket. This is the Middle fixing of the Body Kits. Bodyworks will have a connecting shape, which joins Body and Chassis together)
11th step in the Assembly of INFINITY
Installing the two magnets and top&side fixing bolts of the Frontal Mounting System.
12th step in the Assembly of INFINITY
Front Suspension Bracket Assembly. M3 nuts sinking into the design! In the future the front tower piece will be adjustable with that last step realizing the fully customizable front track.
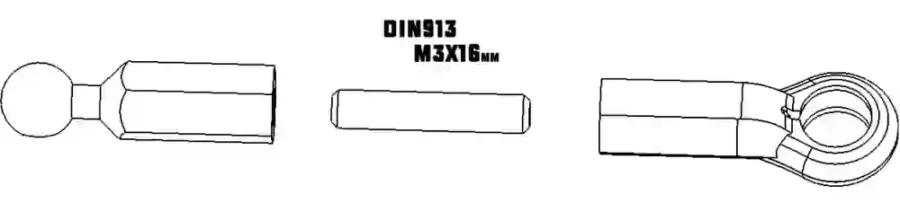
13th step in the Assembly of INFINITY
Assembly of the Turn Buckles (only at the front, no turn buckles at the back!). With Various screws the Front track will be easily adjusted to your desired length.
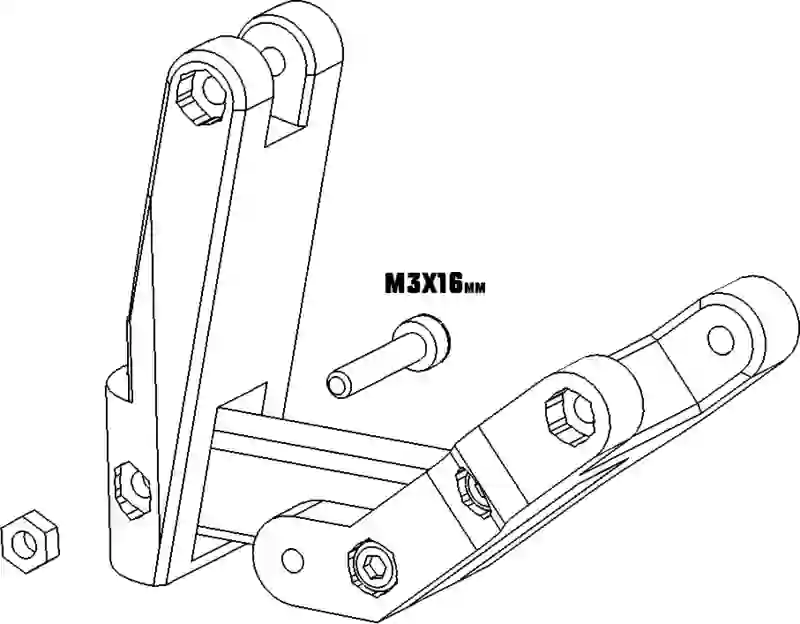
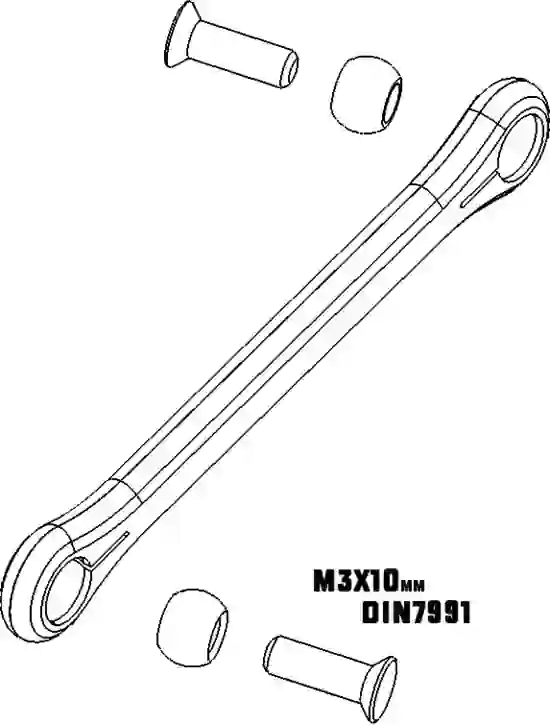
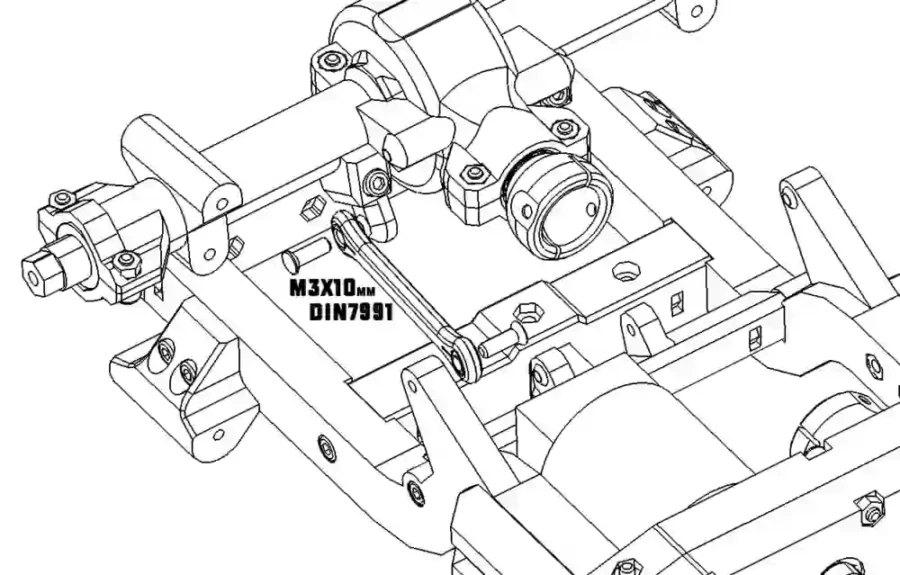
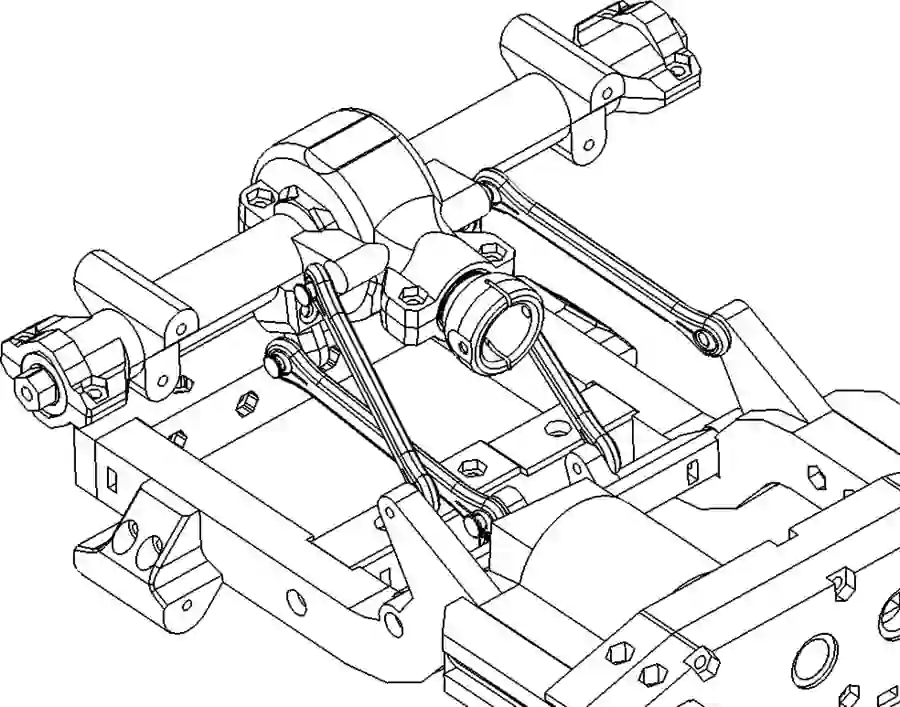
14th step in the Assembly of INFINITY

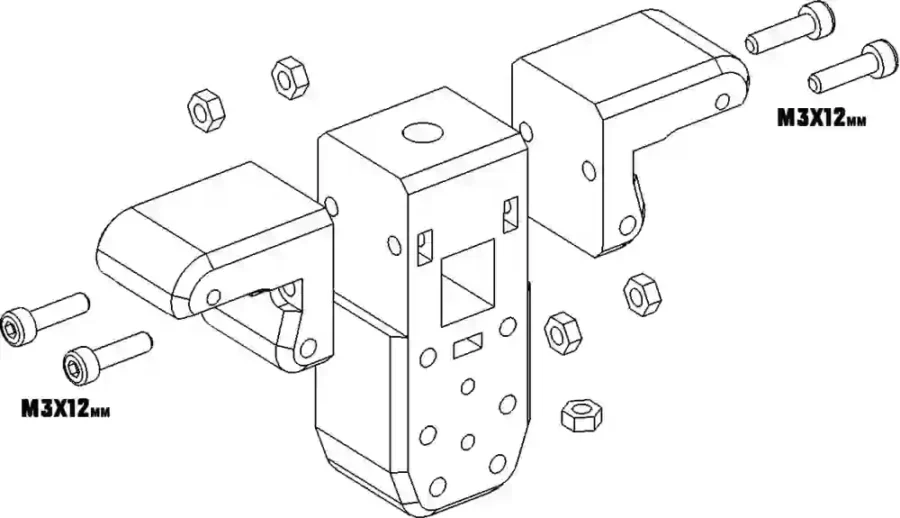
Assembly of the Rocking Arm. It is separated into two piceses to achive more Strength for better responding and withstanding bumpy off-roads
15th step in the Assembly of INFINITY
Bolting of the standing bracket (next to the front wheel)
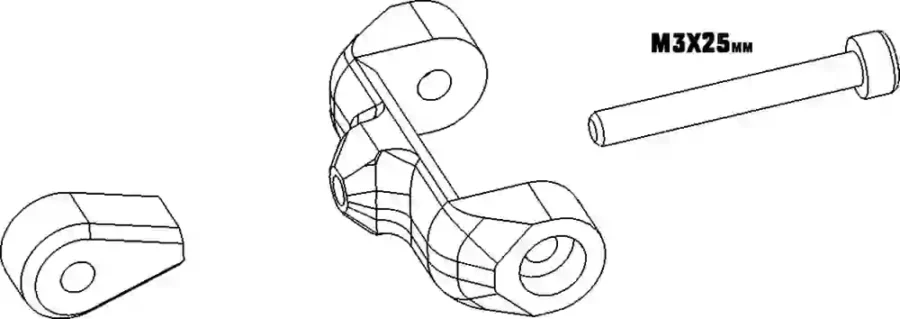
16th step in the Assembly of INFINITY
This knuckle holdes the axle of the wheel. Please make sure to notice the M3 nuts inside the design!
17th step in the Assembly of INFINITY
Fix the axle inside the assembled knuckle
18th step in the Assembly of INFINITY
Fix the knuckle with the front shaft to the standing bracket.
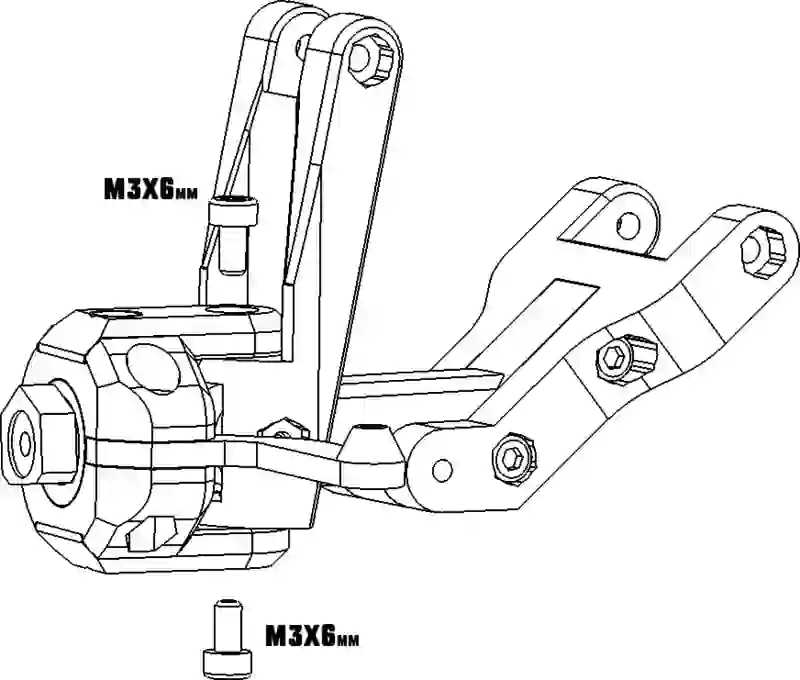
19th step in the Assembly of INFINITY
Bolt the Rocking arm and the Turnbuckle to the Front Suspension Holder Bracket.
20th step in the Assembly of INFINITY
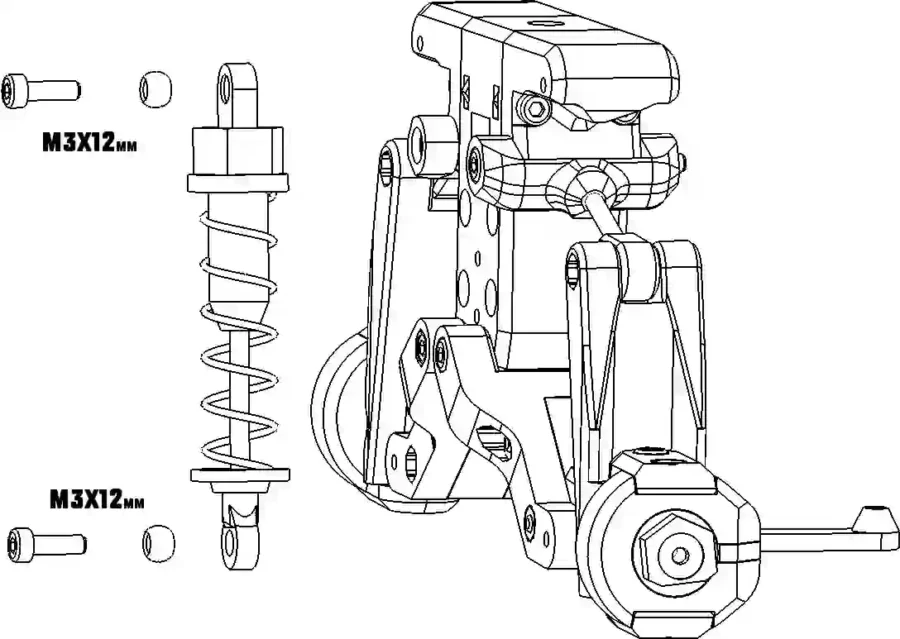
Install the Suspension to its place using the printed ball heads if you need to. There is 5 and 6mm Ball Heads available and a lower suspension end for 6mm Ball Head. If you have suspension that differs, let us know on the forum and we add anything so you can fix stuff properly!
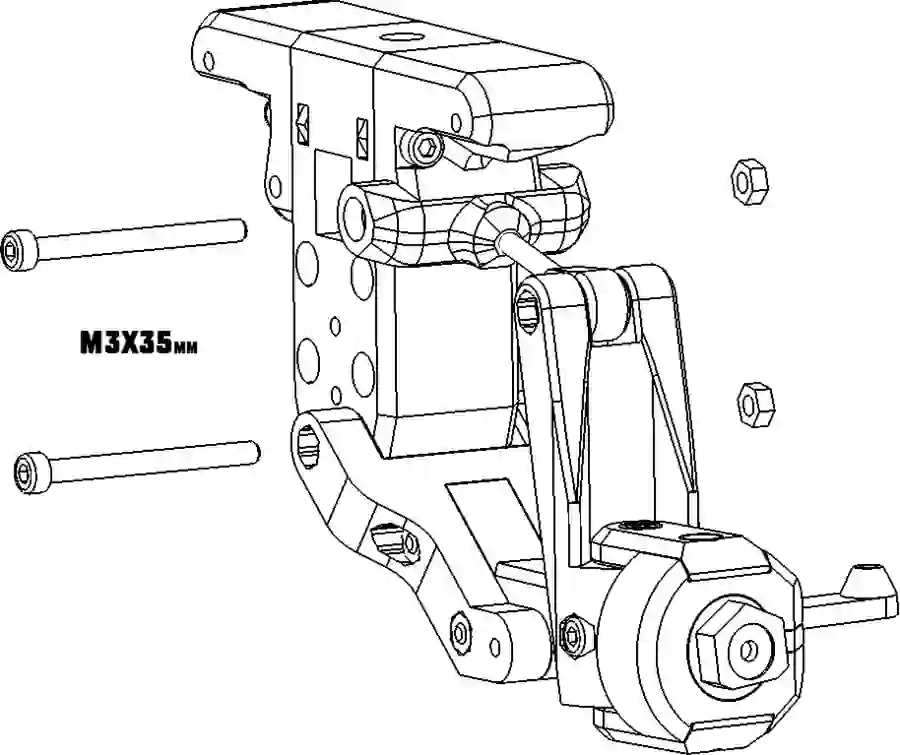
21th step in the Assembly of INFINITY
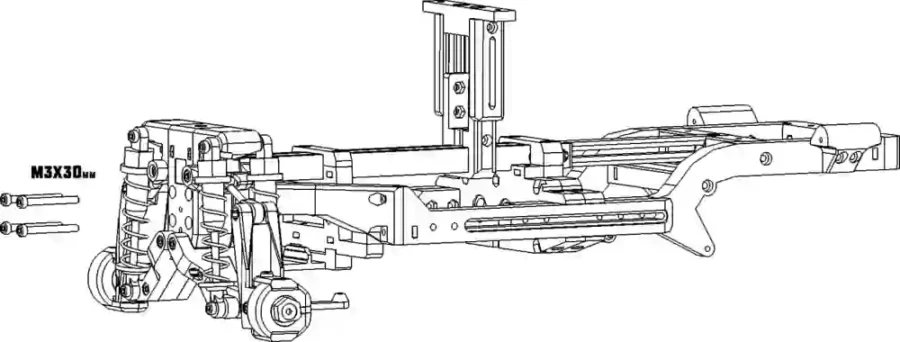
Fix the assembled front part to the frontal frame.
22th step in the Assembly of INFINITY
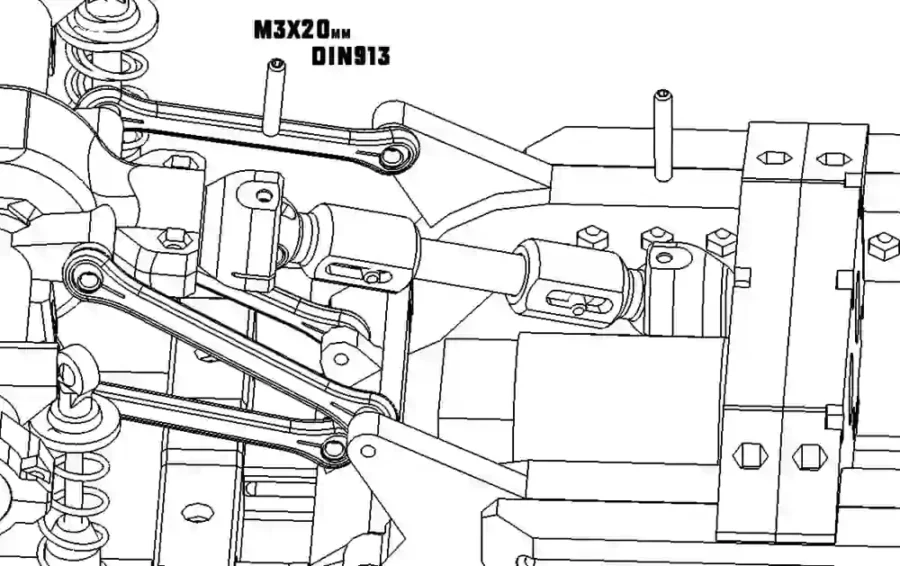
Preferably use a Hexagon Socket Set Screw instead of a cut threaded M3 rod to attach the adjustable steering joints.
23th step in the Assembly of INFINITY
Snap the two sides into the Steering Bar.
24th step in the Assembly of INFINITY
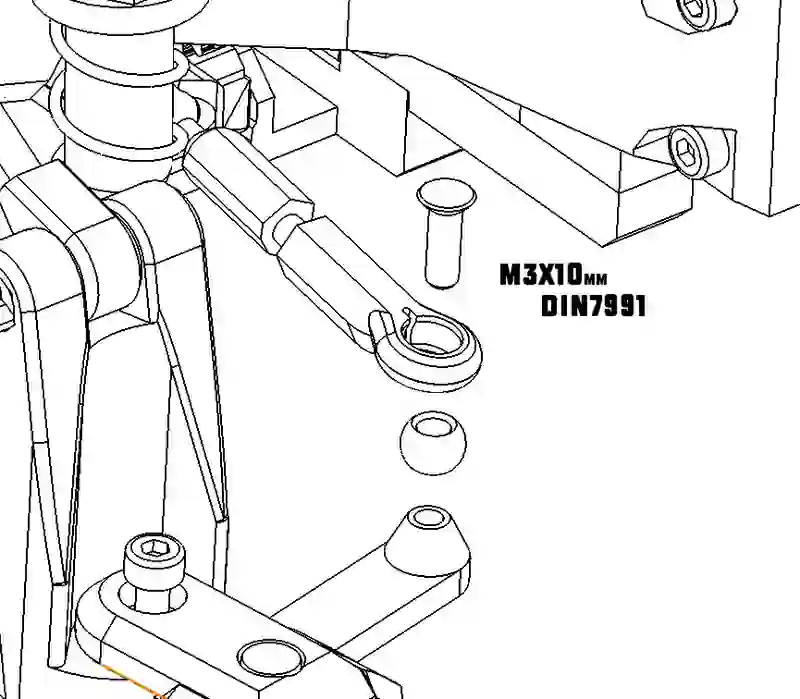
Assemble the steering joints to the knuckles. For better functioning use Haxagon Socket Countersunk Head Bolt instead of a regular one.
25th step in the Assembly of INFINITY
This is the assembly of the Rear Axle. All screws on the illustration have M3 nuts!
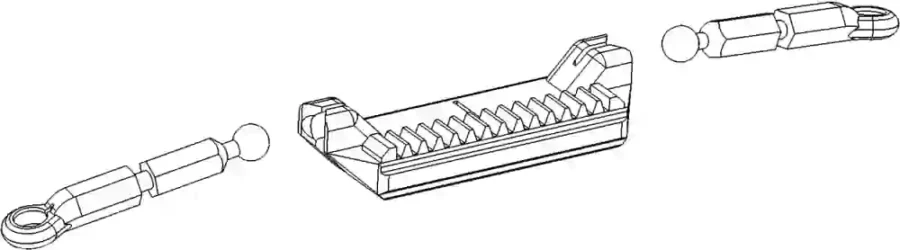
26th step in the Assembly of INFINITY
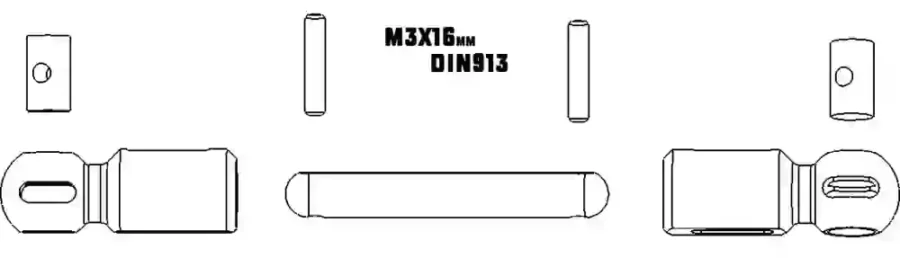
Rear Joint Bar with 6mm Ball Heads.
27th step in the Assembly of INFINITY
Install the rear joint bars, preferably with the noted screw type.
28th step in the Assembly of INFINITY
All four of them put in to their place nicely!
29th step in the Assembly of INFINITY
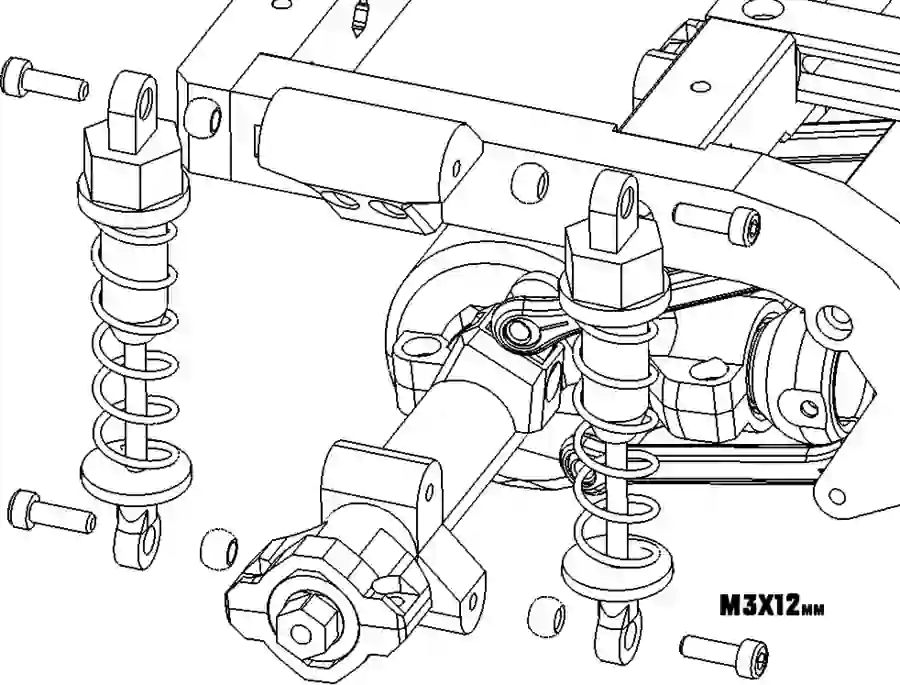
Assembly of the Rear Suspensions.
30th step in the Assembly of INFINITY
Drive Shaft with universal joints (Cardan Shaft)
31st step in the Assembly of INFINITY
An illustrating picture how to install the cardan shaft.
32nd step in the Assembly of INFINITY
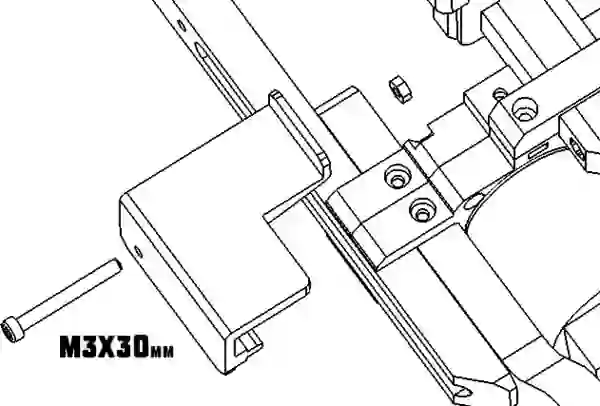
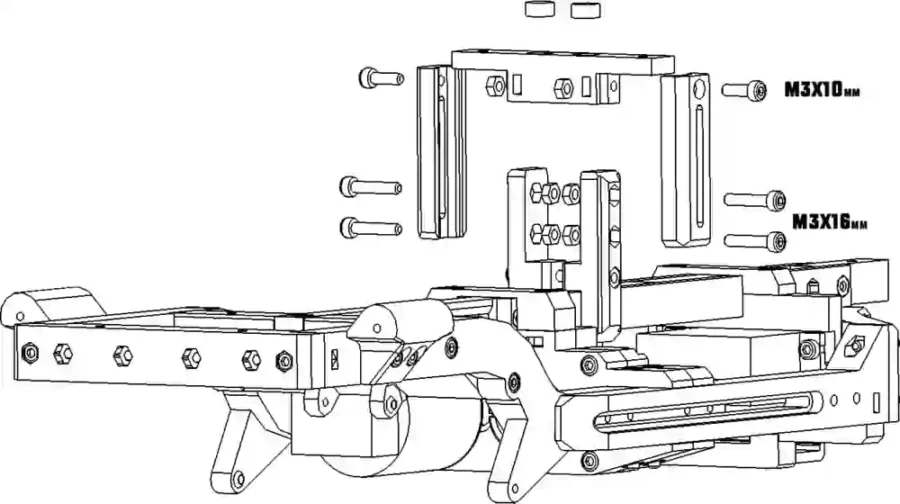
Fix the Bracket for The Electrics (ESC Receiver – Motor controller)
33rd step in the Assembly of INFINITY
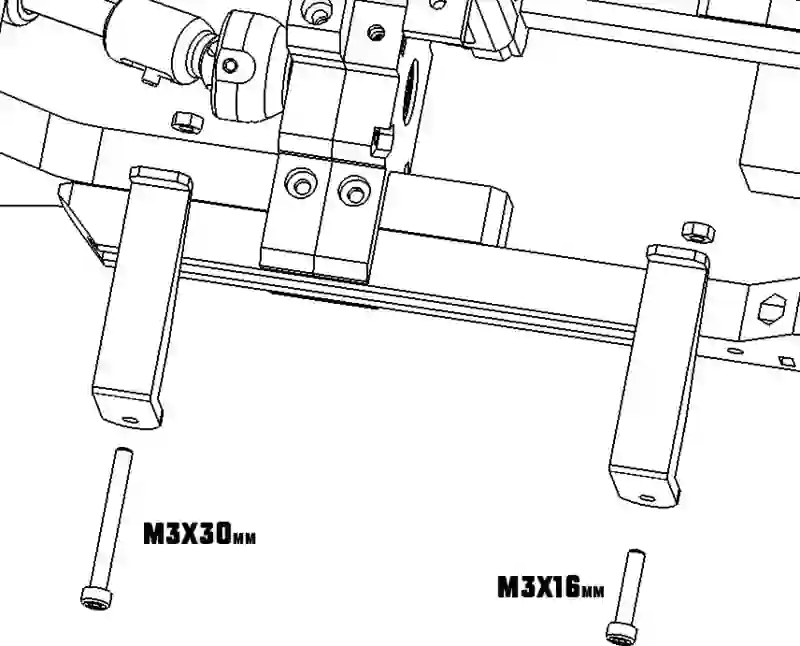
Fix two Brackets of the Battery on the side of the frame for Hook and Loop Fasteners.
34th step in the Assembly of INFINITY
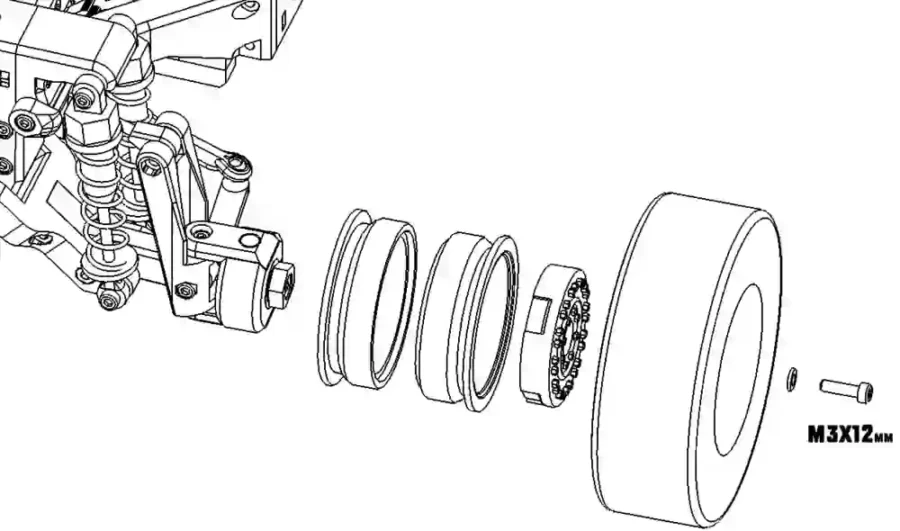
The Wheel was separated into 3 different parts, in order to use less support when 3D printing it. The Tire we used is mentioned in the BOM list. Don’t forget the M3 washer!
35th step in the Assembly of INFINITY
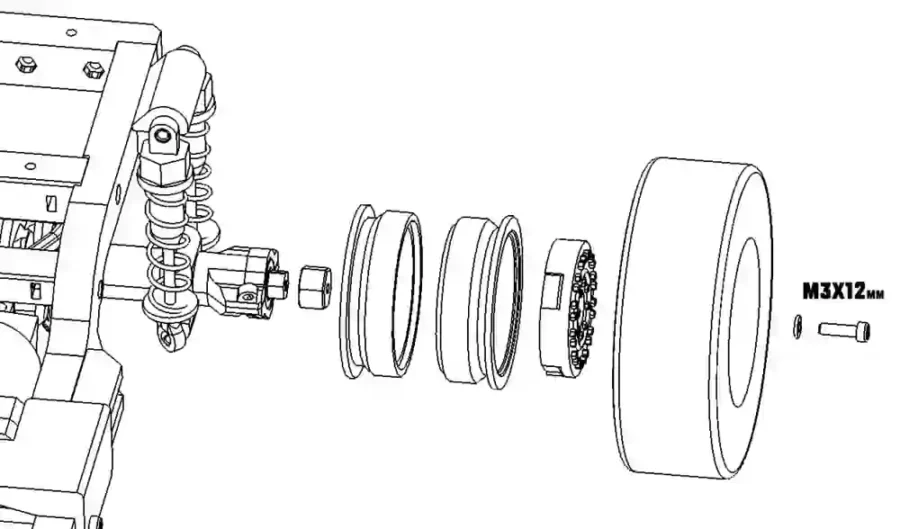
Repeat what you did one step before to get the Rear Wheels ready for action.
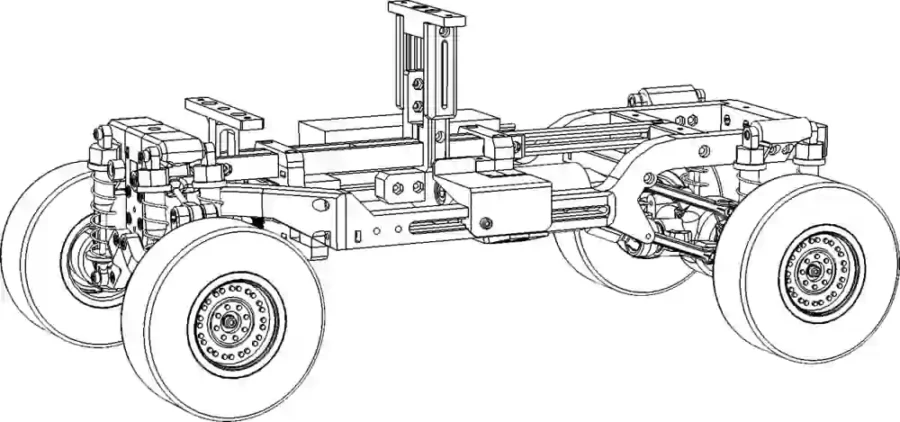
Congrats for A FULLY BUILT INFINITY!
Leave a Reply
You must be logged in to post a comment.